In this tutorial, create interesting depth of field background effects while highlighting the photo’s main subject.
Note: In the first tutorial in this series, you learned to adjust a photo’s depth of field using Snagit’s Spotlight & Magnify feature. You also used the Color Correction options to make small adjustments to color, saturation, and hue. This tutorial builds upon those techniques. If you have not worked through that tutorial, find it here.
- Don’t have any images to use? Download some here: http://bit.ly/1Jg2COb
- Need a way to get your photos into Snagit? Use TechSmth Fuse: http://bit.ly/NRFcsq
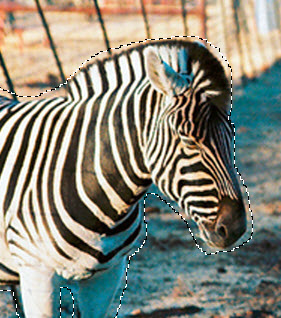
This is the image used in this tutorial.
Image may be NSFW.
Clik here to view.
Cut Out Focus Area
In this first step, cut out the area(s) to be the focal point(s). In the sample image at the top of this post, the cats and dueling people were the focal points. For this tutorial, the two zebras will be the focal points. Each zebra will be cut out separately from the image since there is a gap between them.
- Zoom in on the image so you can see the area to be selected.
- Select Tools tab > Drawing Tools group > Selection tool. Then, select Styles group > Freehand Selection tool.
- Carefully draw a selection around the first focal area. The selection does not have to be exact, just try to get as close to the edge as possible without cutting into the area that will be the focal point. It is better to have too much background in the selection than to cut out any piece of the focal point.
Image may be NSFW.
Clik here to view.
- When the selection is complete, press <Ctrl + C> to copy the selection to the clipboard.
- Press <Ctrl + N> to begin a new canvas.
B: Make sure the canvas background is set to transparent (the canvas should look like a checkerboard.) - Press <Ctrl + P> to paste the selection on the new canvas. Image may be NSFW.
Clik here to view. - Right-click on the image and choose Flatten.

Clean up The Focal Image
In this process, use the the Eraser tool to remove excess background from the edges of the focal image.
Tip: When using the Eraser tool, the part of the eraser that actually removes pixels is the lower, left tip as seen here:
Image may be NSFW.
Clik here to view.
- Zoom in on the image so you can clearly see the background areas that need to be removed.
- Select Tools tab > Drawing Tools group > Eraser tool.
- In the Styles gallery, choose the 1px or 4px width. This will help remove small bits at a time. If you do take off too much, press <Crtl + X> to undo.
- Begin removing the excess background. When done, repeat this process for all other focal pieces. Each piece of focal should be on a separate canvas.
Add Lines To the Background
Before you change the background, make sure you have selected and copied out the focal pieces you will be using.
During this process, lines will be added to the background. When making the lines, use a variety of widths, colors, and lengths.
- Select Tools tab > Drawing Tools group > Pen tool. Image may be NSFW.
Clik here to view. - Select Tools tab > Styles group > Outline tool. From the options choose the color, width, and style. Feel free to experiment to get your own unique look, but here are a few tips:

- Vary the colors from light to dark to get a good mix of contrast. Use black sparingly. Thinner lines seem to work better than fat lines.
- Lines can go vertical, horizontal, or diagonal. Press and hold the <Shift> key to create straight lines in any direction.
- Vary the lines from single to multiple lines that intersect and cross over each other.
- Don’t worry about placing lines over the areas where the focals are.
Here is how our sample image looks with the lines:
Image may be NSFW.
Clik here to view.
Blur & Dim the Background
On the main image, make a very small selection (just a few pixels) on one of the areas you used for a focal piece.
Tip: This is done only to enable the Spotlight and Magnify feature. If no selection is made, you will not be able to use this option.
Adjust the Dim background and Blur background settings to achieve the desired look. Here are the settings for our sample image. When done, click OK.
Image may be NSFW.
Clik here to view.
Adjust the Color
In this process, the Color Correction options will be used to change the look and color of the background. Use the hue, saturation, and gamma options to change your colors. When done, click OK.
Here are some looks you can achieve by adjusting the color options:
Image may be NSFW.
Clik here to view.
Image may be NSFW.
Clik here to view.
Here is the look I’ll use for this example:
Image may be NSFW.
Clik here to view.
Complete the Background with a Small Blur
To complete the background, a slight blur will be added.
- Select Tools tab > Drawing Tools group > Blur tool.
- Select Type > Smooth arrow button > Custom > Set to 5.
- Choose OK. A blur object is added to the image. Resize the blur to cover the entire image.
- Right-click the blue object and choose Flatten.
Complete the Focal Image and Add to Background Image
In this process, a shadow will be added to the focal part of the image before it is added back into the background image.
Before adding the shadow, think about what color you want the shadow to be. If you went light on the background, a darker shadow would be best. If the background is dark, a lighter shadow will work.
- Move to the image containing the focal image in Editor’s tray.
- Select Image tab > Styles group box > Effects arrow > Shadow arrow > More Shadows.
- From the options, choose the shadow depth, color, and position. When done, click OK.
- Press <Ctrl + A> to select the image then press <Ctrl + C> to copy the image to the clipboard.
- Move over to the background image. Press <Ctrl + V> to paste the image. Move it into the correct location then right-click and choose Flatten.
- Repeat this process for each focal image you created.
This is how our sample image turned out.
Image may be NSFW.
Clik here to view.
Variations on this Theme
Make the canvas larger and fill with black. Add the focal images just off the canvas.
Image may be NSFW.
Clik here to view.
Make the canvas larger, fill with black, and apply a slight Perspective effect. Add the focal images off the page.
Image may be NSFW.
Clik here to view.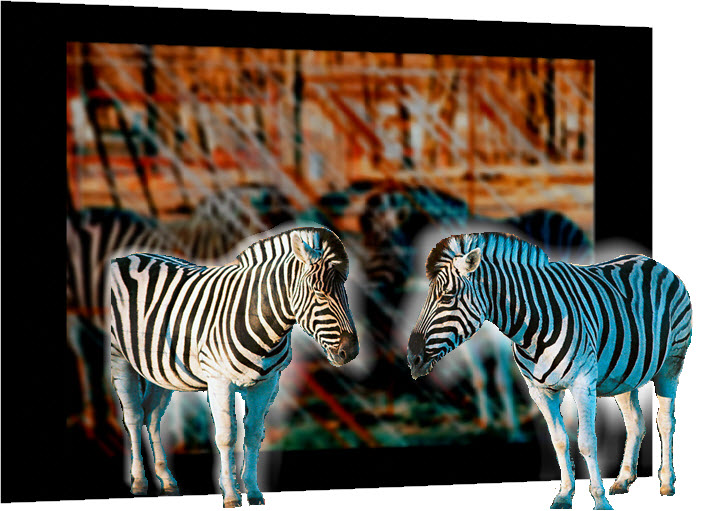
Make the canvas larger and fill with black or another solid color. Apply an image mask created in this previous tutorial.
Image may be NSFW.
Clik here to view.
The post Create Depth of Field Special Effects With Snagit 12 – Part 2 appeared first on TechSmith Blogs.